This is the multi-page printable view of this section.
Click here to print.
Return to the regular view of this page.
Getting Started
Setting up MeetingRoomMap and installing add-ins
This section describes the steps needed to start using MeetingRoomMap.
Prerequisites
Microsoft Office 365
The add-ins are made for the Office 365 suite, and MeetingRoomMap registers as an application in Azure AD and expects users to log in with a valid Azure AD/Office 365 account. Meeting rooms and people to map are fetched from Azure AD. Thus an active Office 365 subscription is needed.
Paid subscription plan for MeetingRoomMap
Using the admin website and add-ins of MeetingRoomMap, requires a paid subscription plan - see Sign-up for MeetingRoomMap subscription.
The subscription is obtained through the Microsoft Azure Marketplace and billed monthly through the Azure billing.
Free trial
A free trial exists for trying out MeetingRoomMap. For a period of two weeks, the admin website and all add-ins can be used without an active subscription.
Granting consent
Before starting to use the admin website or any of the add-ins, an administrator must grant consent to MeetingRoomMap - see Granting consent to the MeetingRoomMap service.
Installation of add-ins
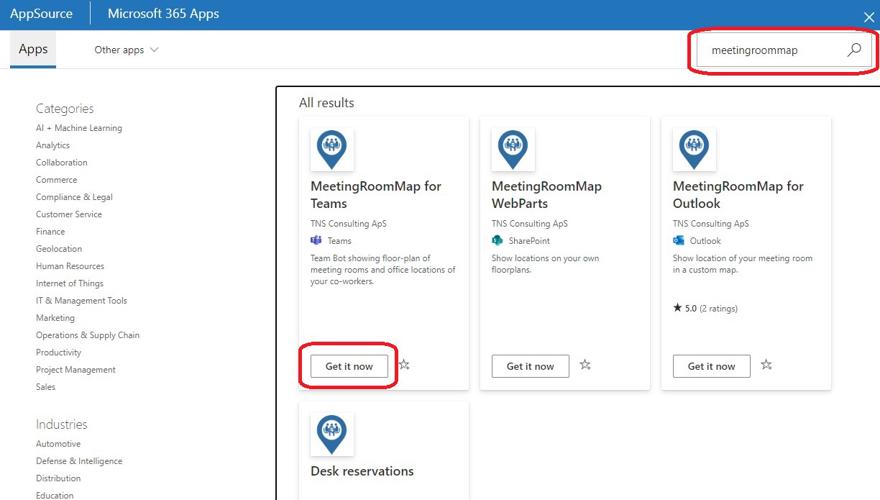
The different Office add-ins are all available in the Microsoft AppSource store:
Install one or more of the above add-ins as needed. Follow the installation guide below for each of the add-ins.
1 - Granting consent to the MeetingRoomMap service
Before using the MeetingRoomMap admin site or any of the add-ins, an Azure/Office365 Tenant administrator needs to give consent.
The MeetingRoomMap service is being registered as an application in Azure Active Directory (AAD) and requires a few permissions in the target AAD to function.
Grant consent as tenant administrator
To grant consent to MeetingRoomMap, click on “Enroll your company in MeetingRoomMap” on the front page of the admin site (https://www.meetingroommap.net) or go directly to this link:
https://www.meetingroommap.net/Account/SignUp
To grant tenant-wide admin consent, you need:
An Azure account with one of the following roles: Global Administrator, Privileged Role Administrator, Cloud Application Administrator, or Application Administrator. A user can also be authorized to grant tenant-wide consent if they are assigned a custom directory role that includes the permission to grant permissions to applications.
Learn more about granting admin consent here:
https://docs.microsoft.com/en-us/azure/active-directory/manage-apps/grant-admin-consent
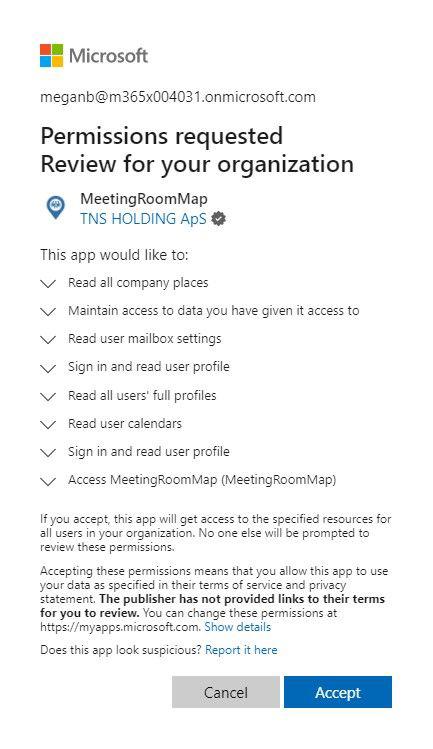
Permissions
When granting consent the following list of delegated permissions are requested:
The table below indicates the usage and justification of each individual delegated permission:
| Permission |
Microsoft internal name |
Description |
| Read all company places |
Place.Read.All |
Allow to read list of company’s places (meeting rooms and room lists). Needed to map meeting rooms defined in Azure AD to floorplans. |
| Maintain access to data you have given it access to |
offline_access |
Maintain access to data you have given it access to. |
| Read user mailbox settings |
MailboxSettings.Read |
Allow to read users mailbox settings. Add-ins need timezone info from mailbox settings to display correct dates/time for displaying meetings. |
| Sign in and read user profile |
User.Read |
Needed in order to sign in as a user and get basic user profile info. |
| Read all users' full profiles |
User.Read.All |
Read other users profiles. Needed to get OfficeLocation attribute in order to use MeetingRoomMap to map co-workers and used to facilitate search for co-workers. |
| Read user calendars |
Calendars.Read |
Allows the app to read events in your calendars. Outlook add-in needs this to access the current meeting and Teams Bot uses this to show your next meetings. |
| Access MeetingRoomMap (MeetingRoomMap) |
N/A |
Allow the admin site and add-ins to access the MeetingRoomMap backend API on behalf of the signed-in user. |
|
|
|
What’s next?
- Assign editor role: Assign users/groups the editor role in order to delete floorplans and mappings.
- Outlook add-in: Install the Outlook add-in to show location of meeting rooms inside Outlook meetings.
- Web parts for SharePoint and Teams: Install the SharePoint web parts for searching and displaying rooms, users, and custom locations in SharePoint pages and Teams.
2 - Assign editor role
Users and groups can be assigned the editor role to delete floorplan images, remove mapped locations, etc.
All users signed into the admin website can upload new floorplan images and create mappings (rooms, people, and custom locations).
A standard user does not, however, have the ability to:
- Delete a floorplan (including all existing mappings related to this floorplan)
- Remove (or re-assign) an existing mapping (room, person or custom location)
To enable these actions, a user must be assigned the role “MeetingRoomEditor”:
- Go to the Enterprise Application “MeetingRoomMap” in Azure AD ( Azure portal -> Azure Active Directory -> Enterprise Applications -> All applications -> select “MeetingRoomMap”)
- Select “Users and groups”
- Select “+ Add user/group” (or edit of the user is already listed with role “Default access”)
- Select the needed user/group and ensure the role “MeetingRoomEditor” is selected. Click “Assign”.
What’s next?
- Outlook add-in: Install the Outlook add-in to show location of meeting rooms inside Outlook meetings
- Web parts for SharePoint and Teams: Install the SharePoint web parts for searching and displaying rooms, users, and custom locations in SharePoint pages and Teams.
3 - Install Outlook add-in
The Outlook add-in provides users to view the location of meeting rooms from within Outlook meetings.
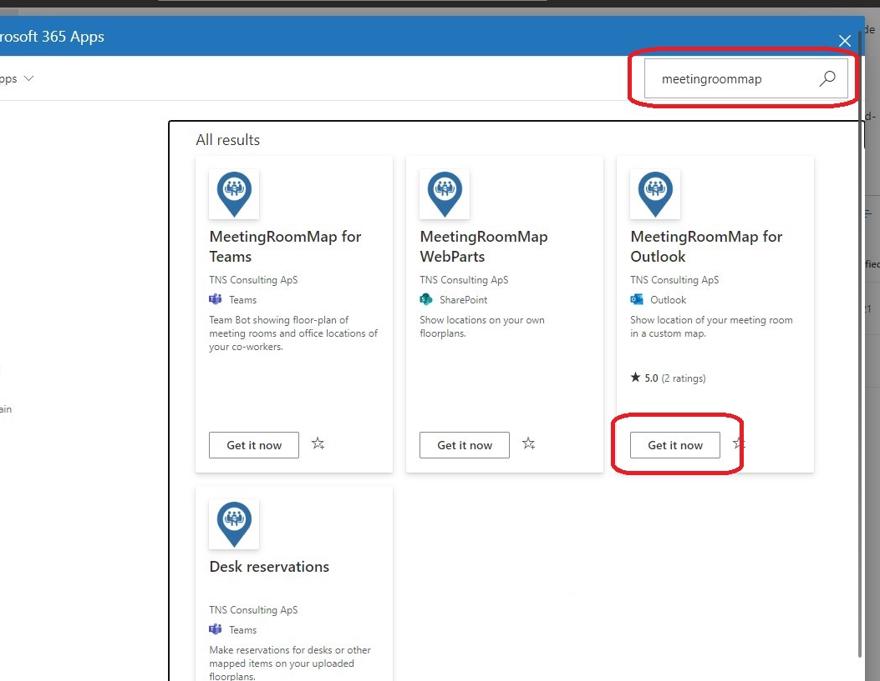
The MeetingRoomMap Outlook add-in is available in the Microsoft App store:
https://appsource.microsoft.com/en-us/product/office/WA104381386
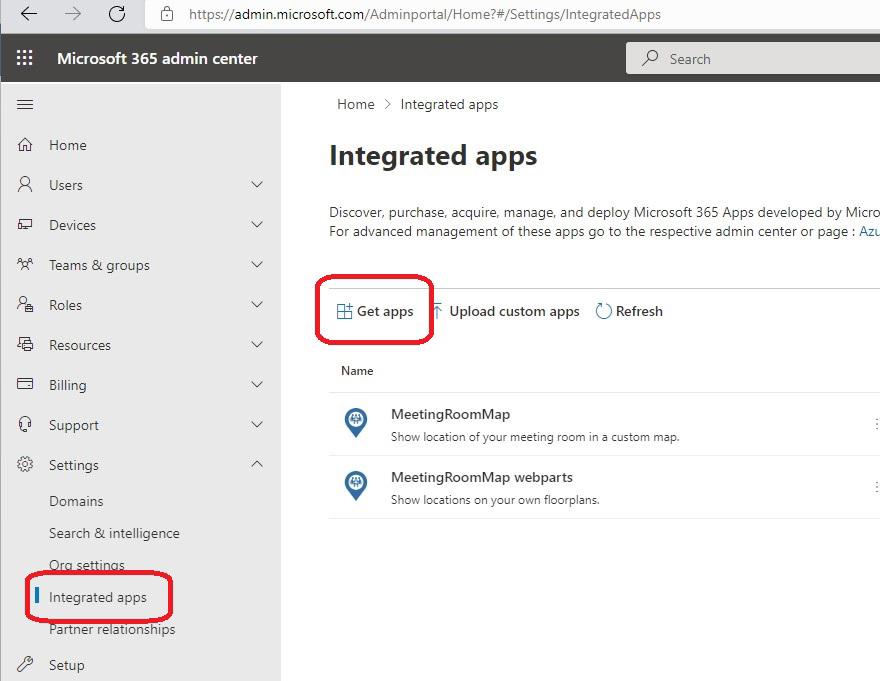
Centralized Deployment from Microsoft 365 admin center
We recommend deploying the add-in by using the Centralized Deployment feature in the Microsoft 365 admin center Microsoft 365 admin center.
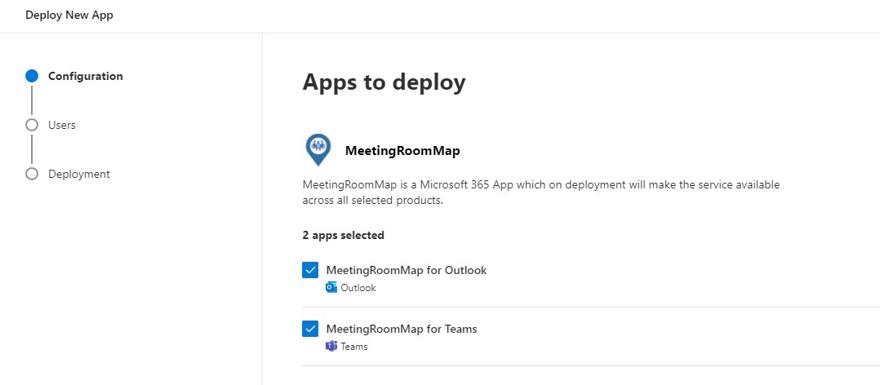
3. Choose if you want to install only the Outlook add-in or both the Outlook add-in and the Teams Bot at the same time
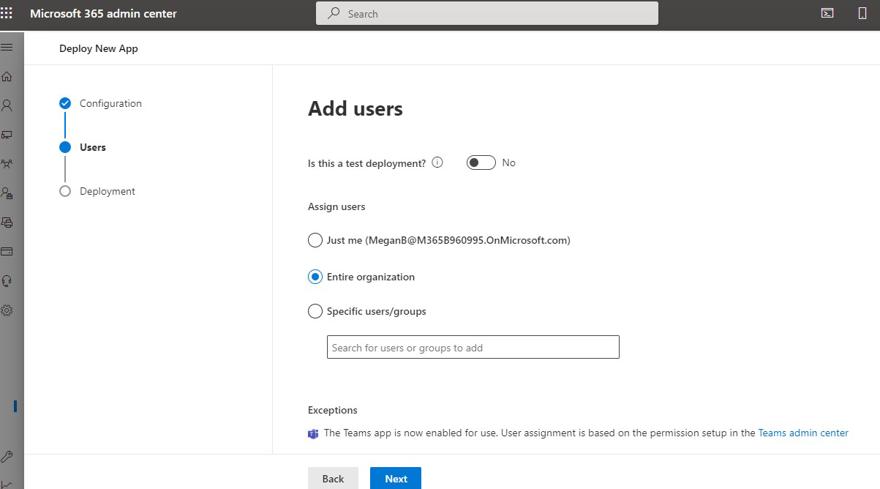
4. Select the users to receive the add-in (you can start with a limited set of users/groups to test before rolling out to the entire organization)
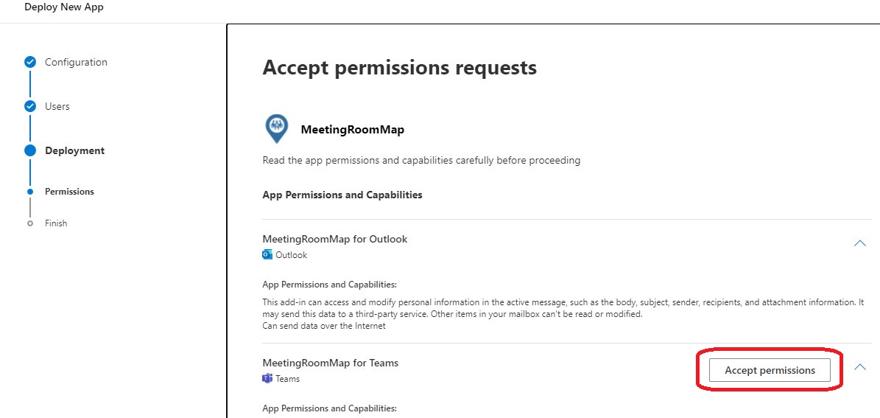
5. Accept any missing permissions if needed
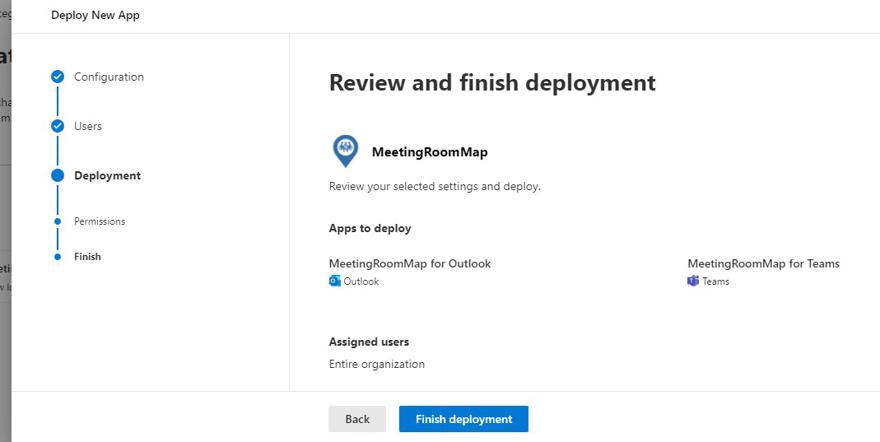
5. Click “Finish deployment” and then done.
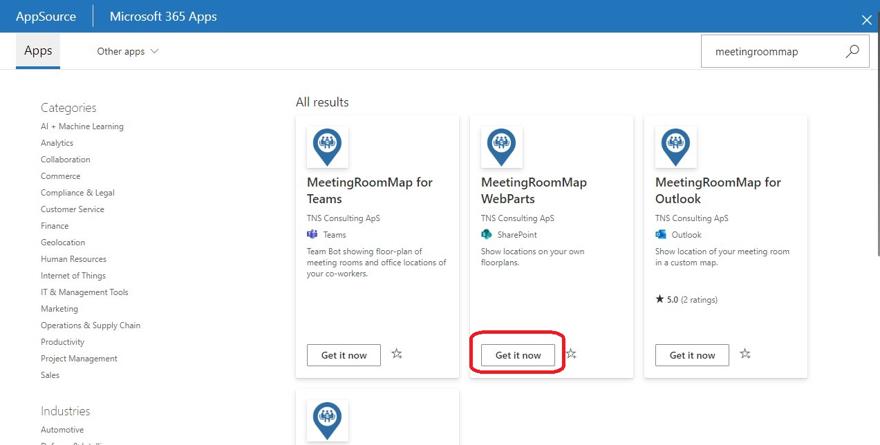
4 - Install web parts for SharePoint and Teams
The SharePoint web parts enables users to search and view meeting rooms, people and custom locations in both SharePoint and Teams.
The MeetingRoomMap web parts for SharePoint and Teams add-in is available in the Microsoft App store:
https://appsource.microsoft.com/en-us/product/office/WA200001948
Centralized Deployment from Microsoft 365 admin center
We recommend deploying the add-in by using the Centralized Deployment feature in the Microsoft 365 admin center Microsoft 365 admin center.
3. SharePoint add-ins can’t modify users, so just click “Next” on the “Add users” page.
4. Click “Next” on the “Accept permissions requests” page.
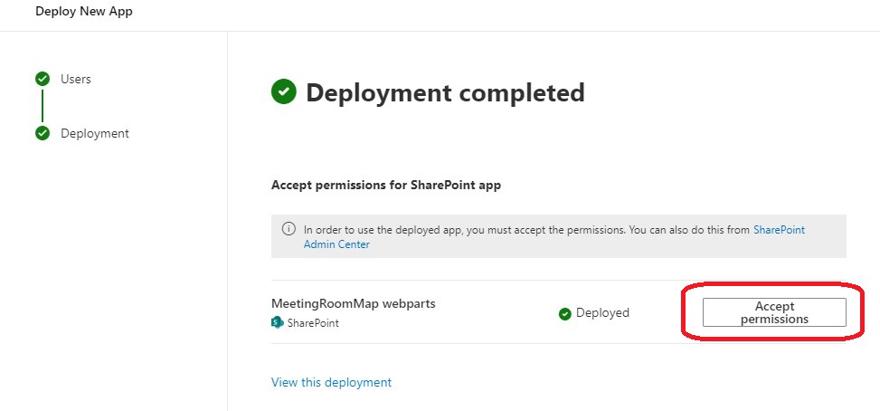
5. Click “Finish deployment” on the “Review and finish deployment” page.
6. Make sure you click “Accept permissions” and grant permissions. Click “Done” once permissions accepted.
Make sure Web parts are available in all SharePoint sites as well as Teams.
Once the web part add-in has been installed, a SharePoint administrator needs to deploy the app to all SharePoint sites as well as make the web parts available in Teams.
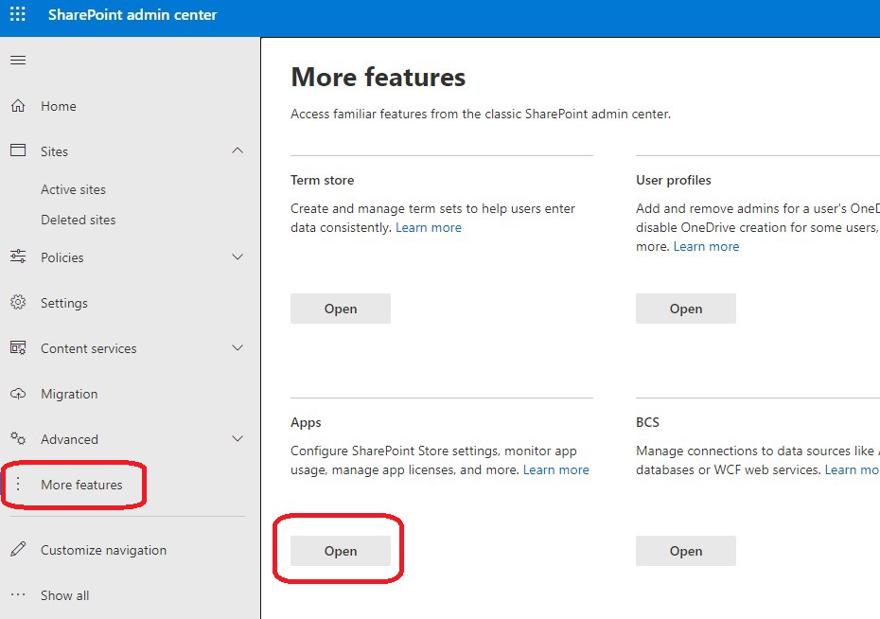
SharePoint administrator needed
To access SharePoint app catalog you need to be a SharePoint administrator.
1. Go to the SharePoint app catalog. (From the SharePoint admin center, https://<your tenant name>-admin.sharepoint.com/_layouts/15/online/AdminHome.aspx#/ home -> More Features -> Apps.
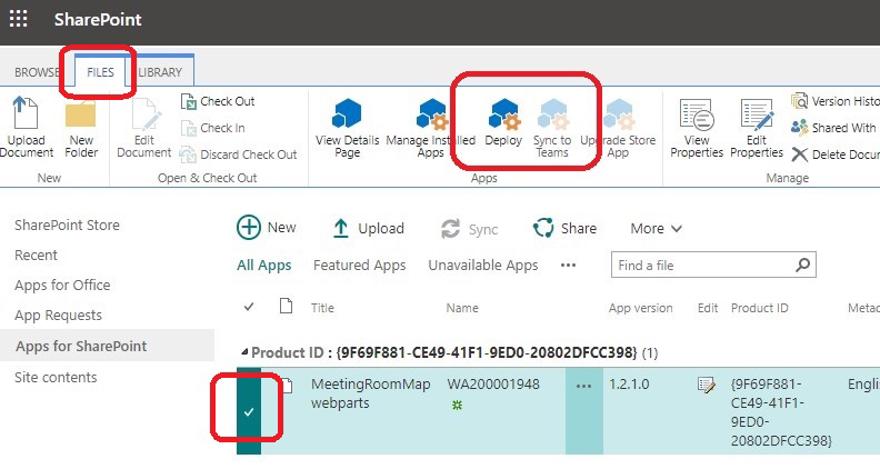
2. On the “Apps” page, click “App Catalog” and then “Apps for SharePoint”.
3. In the “Apps for SharePoint page”, select MeetingRoomMap webparts row in the list, then select the “Files” tab and click the “Deploy” button. Ensure the “Make this solution available to all sites in the organization” is selected in the “Do you trust MeetingRoomMap webparts?” pop-up dialog.
Adding web parts to SharePoint and Teams
SharePoint
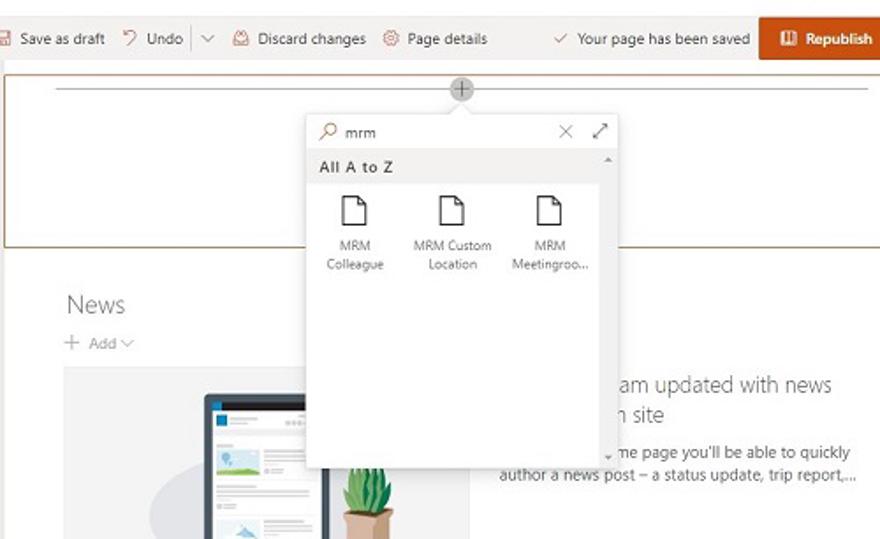
When the web parts have been installed and sync’ed to Teams, they can be added to any modern SharePoint page. Search for ‘mrm’ to quickly look up the three MeetingRoomMap webparts:
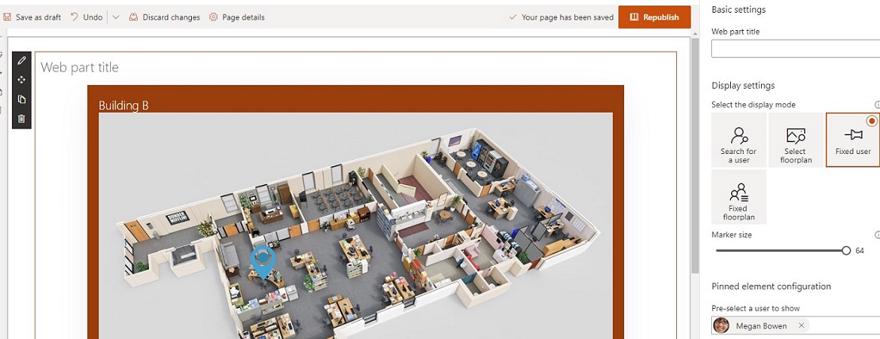
Use web part properties to configure how the web part should behave (search mode or fixed location etc.):
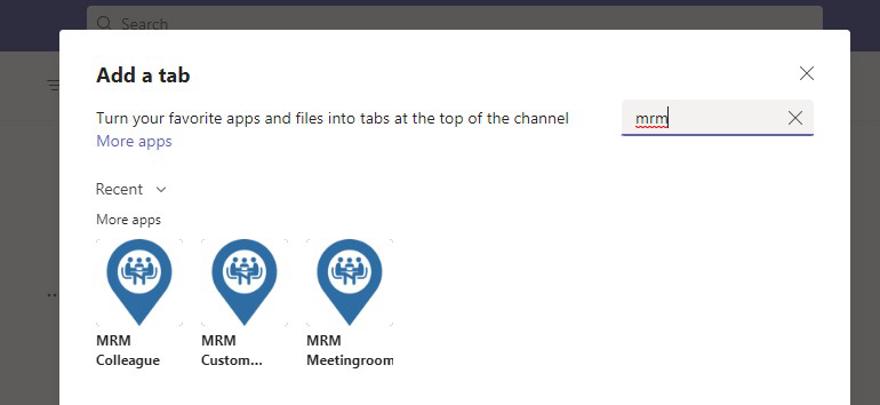
Teams
The web parts can also be added as a Teams tab (either in a Channel or as a ‘Personal’ tab):
5 - Install Teams Bot
The Teams bot lets users interact with a bot to query and display meeting rooms, people, and custom locations as well as get information and a map of the user’s upcoming meetings.
The MeetingRoomMap Teams Bot is available in the Microsoft App store:
https://appsource.microsoft.com/en-us/product/office/WA104382042
Centralized Deployment from Microsoft 365 admin center
We recommend deploying the add-in by using the Centralized Deployment feature in the Microsoft 365 admin center Microsoft 365 admin center.
3. Choose if you want to install only the Teams Bot or both the Teams Bot and the Outlook add-in at the same time
4. Select the users to receive the add-in (you can start with a limited set of users/groups to test before rolling out to the entire organization)
5. Accept any missing permissions if needed
5. Click “Finish deployment” and then done.
6 - Install Reservations Teams add-in
The reservations add-in for Teams enables users to visually perform reservations for desks or other custom locations defined.
The reservation system is built as a Teams app. The Desk Reservations app is available in the Microsoft App store:
https://appsource.microsoft.com/en-US/product/office/wa200003532
Prepare Desk Reservations for all users
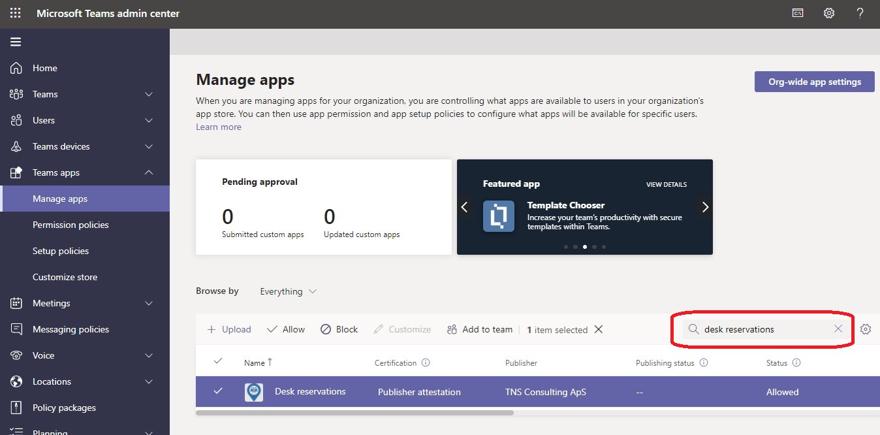
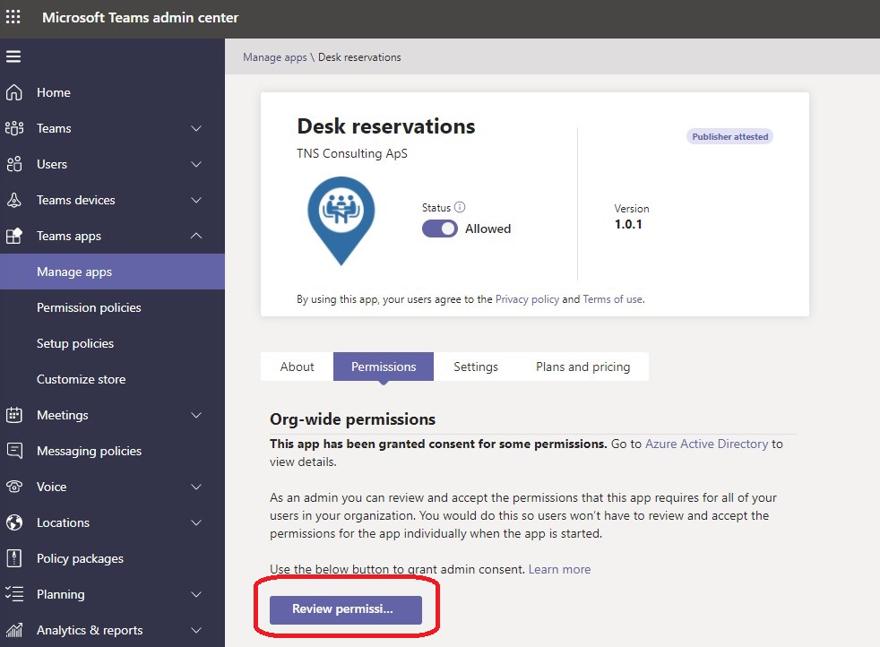
To prepare Desk Reservations to be used for the company, a Teams administrator should grant org-wide permissions:
2. Select Desk Reservations app and go to the “Permissions” tab. From here click “Review permissions” and accept permissions
The following list of permissions are granted:
|
Permission |
Microsoft internal name |
Description |
|
|
Sign in and read user profile |
User.Read |
Needed in order to sign in as a user and get basic user profile info. |
|
|
Read all users' basic profiles |
User.ReadBasic.All |
Read other users basic profiles. Needed to be able to show names of Team member bookings. |
|
|
Have full access to user files |
Files.ReadWrite |
Allows the app to read, create, update and delete the signed-in user’s files. Using OneDrive’s app folder to store user specific settings (i.e. default floorplan/desk etc.) |
|
|
Read the members of teams |
TeamMember.Read.All |
Read the members of teams, on behalf of the signed-in user. Needed to get reservations from other team members. |
|
|
Read the members of channels |
ChannelMember.Read.All |
Read the members of channels, on behalf of the signed-in user. Needed to get members when add-in is in a private channel. |
|
|
Read the names and descriptions of teams |
Team.ReadBasic.All |
Read the names and descriptions of teams, on behalf of the signed-in user. |
|
|
Read the names and descriptions of channels |
Channel.ReadBasic.All |
Read the names and description of channels, on behalf of the signed-in user. |
|
|
Access MeetingRoomMap (MeetingRoomMap) |
N/A |
Allow the admin site and add-ins to access the MeetingRoomMap backend API on behalf of the signed-in user. |
|
|
|
|
|
|
| |
Installing Desk reservations in Teams
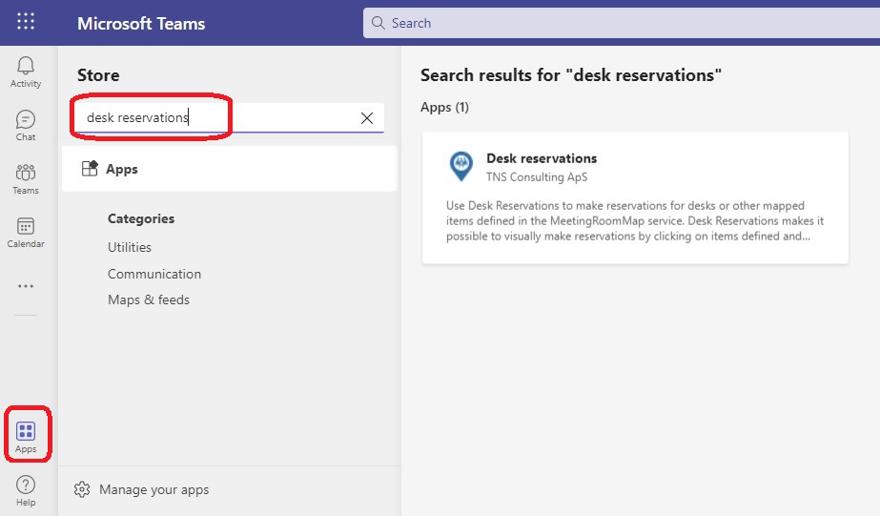
Once an administrator has granted permissions, any user can add the Desk reservations app in Teams - either in a Teams channel or as a personal tab.
Click “Add a tab” from within any channel or use the “Apps” button and search for “Desk reservations”:
If added from “Apps” button, then the user can choose to add the app as a personal tab or add it to a specific Team. As a personal tab the app can be pinned like any other app.
What’s next?
6.1 - Assign ReservationsAdmin role
Users and groups can be assigned the ReservationsAdmin role to be able to view and delete any users reservations
Reservations are normally edited and viewed using the Reservations add-in in Teams. It’s only possible to view your own reservations or those made by other team members - not the entire organization. But an administrator has the ability to view all the reservations across the organization and the possibility to delete reservations made by others. This is done through the admin web site:
https://www.meetingroommap.net/reservations
To enable these actions, a user must be assigned the role “ReservationsAdmin”:
- Go to the Enterprise Application “MeetingRoomMap” in Azure AD ( Azure portal -> Azure Active Directory -> Enterprise Applications -> All applications -> select “MeetingRoomMap”)
- Select “Users and groups”
- Select “+ Add user/group” (or edit of the user is already listed with role “Default access”)
- Select the needed user/group and ensure the role “ReservationsAdmin” is selected. Click “Assign”.
What’s next?
7 - Sign-up for MeetingRoomMap subscription
Using the admin site or any of the Office add-ins requires an active subscription for MeetingRoomMap.
Paid subscription plan for MeetingRoomMap
Using the admin website and add-ins of MeetingRoomMap, requires a paid subscription plan - see https://www.meetingroommap.net/Pricing.
The subscription is obtained through the Microsoft Azure Marketplace and billed monthly through the Azure billing.
Free trial
A free trial exists for trying out MeetingRoomMap. For a period of two weeks, the admin website and all add-ins can be used without an active subscription. The free trial is automatically activated after granting consent to MeetingRoomMap.
Requires an Azure subscription
The MeetingRoomMap subscription is added as a SaaS resource in Azure and requires an Azure subscription. If there is no Azure subscription available, you will be prompted to create one during the sign-up for MeetingRoomMap.
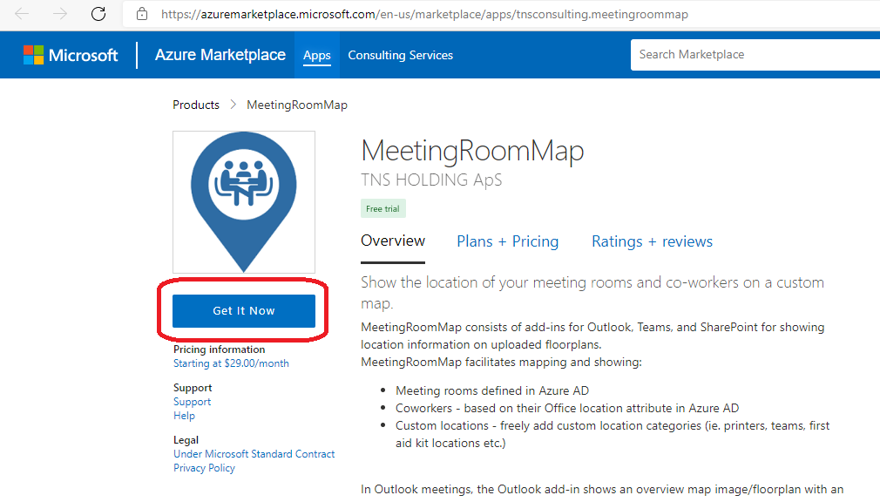
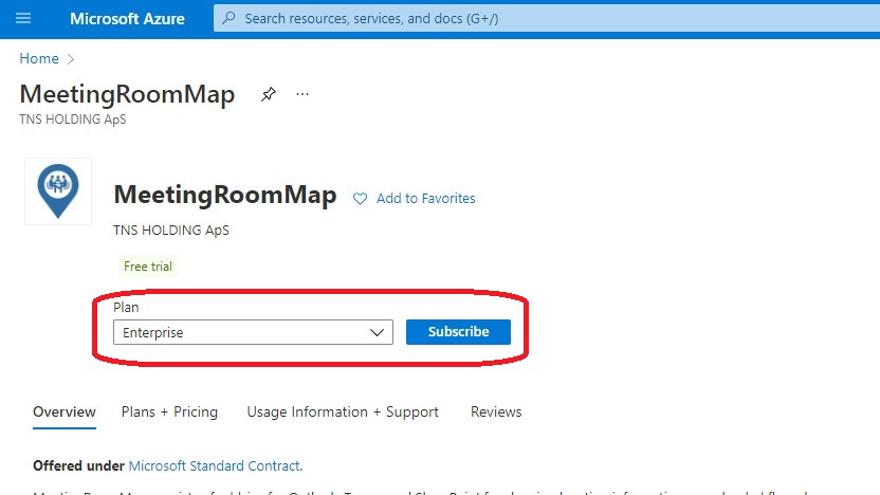
After selecting "Get It Now" you are redirected to the Azure portal
2. In the Azure portal, Select the desired plan and click “Subscribe”
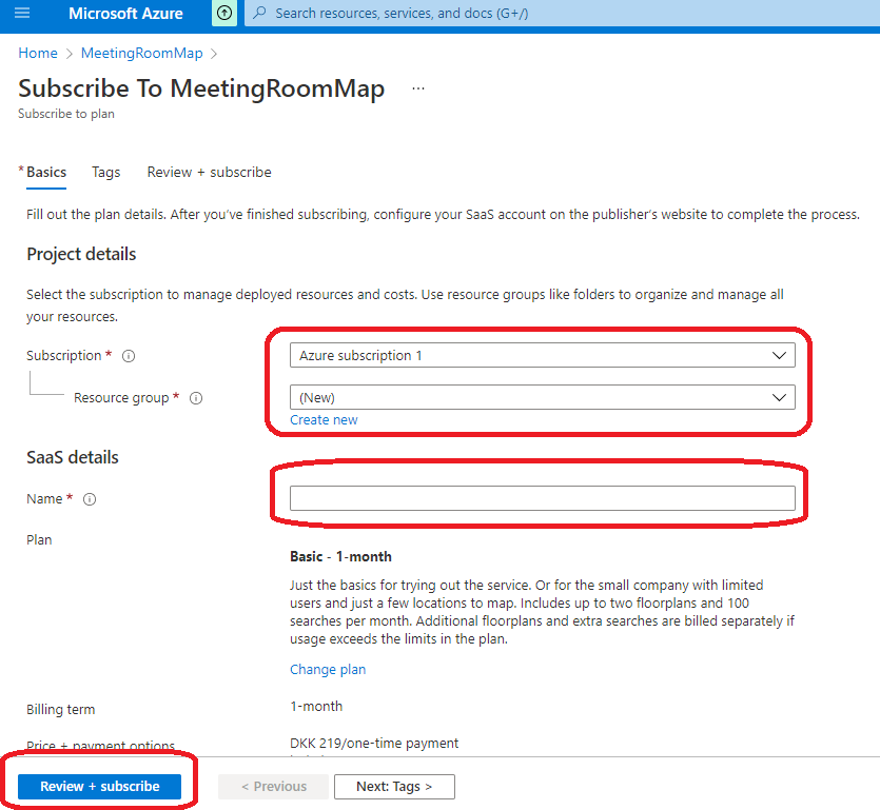
3. Select location (Azure subscription resource group) and name for the MeetingRoomMap SaaS ressource -> then click “Review + subscribe” and “Subscribe” on the final confirmation page
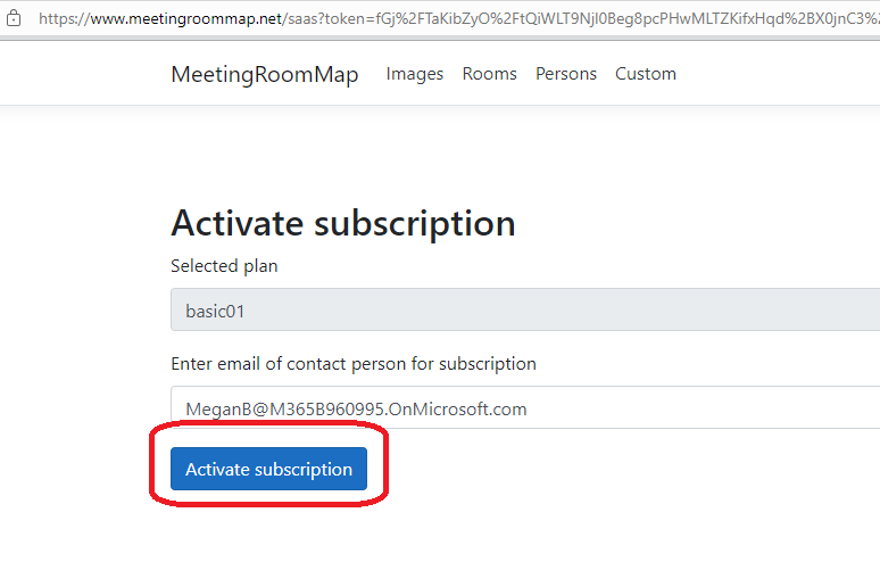
5. After being redireted to MeetingRoomMap admin website - Click “Activate subscription”