The admin website, https://www.meetingroommap.net, is the place to upload your own floorplans and maintain mappings for meeting rooms, people as well as custom locations.
See the sections below for common tasks:
This is the multi-page printable view of this section. Click here to print.
The admin website, https://www.meetingroommap.net, is the place to upload your own floorplans and maintain mappings for meeting rooms, people as well as custom locations.
See the sections below for common tasks:
To upload a floorplan, go to the Images page available in the top menu. Drag and drop images into the square labeled “Drop files here or click to upload” to upload image files. Alternatively, click the square, which opens a file dialog to select an image to upload.
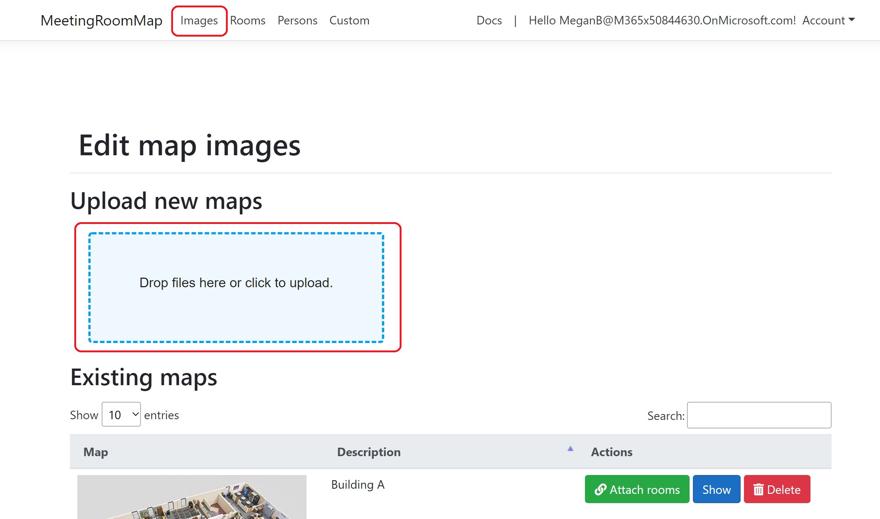
After uploading an image, MeetingRoomMap processes the image by scaling it to different sizes. It might take a few seconds before being completed. Once the image has been processed, it will be added to the list of existing maps below.
The following image types are valid (based on file-extension name): jpg, png, gif, jpeg.
All these work equally well in MeetingRoomMap. There are some general differences in what each file type best represents (see i.e.: https://www.sitepoint.com/gif-png-jpg-which-one-to-use/ )
MeetingRoomMap will scale the uploaded image to two different sizes:
So make sure that the uploaded image is displayed clear and correctly in both these resolutions. To avoid a pixelated large image, it’s better to upload an image with at least 900px in width.
Height will be adjusted in relation to width and keep aspect ratio, so the image is not stretched. For best display try to upload images that are close to a square form, and not having one side much longer than the other side.
The name of a floorplan will initially be the same as the filename of the uploaded image.
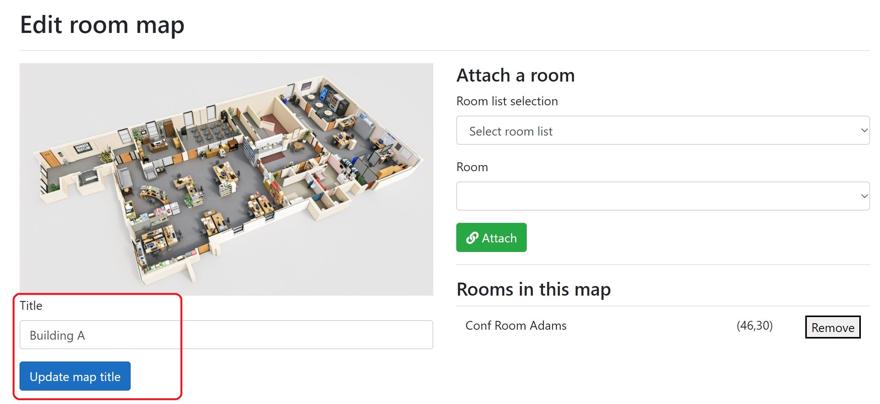
To rename a floorplan, go to the Images page and click the “Attach rooms” button for the floorplan to edit. From within the “Edit room map” page, change the “Title” field and click “Update map title”.
To delete a floorplan, go to the Images page and click the “Delete” button for the floorplan to delete.
A mapped meeting room can be displayed in the Outlook add-in when editing or viewing a meeting as well as being searched and viewed in the Teams and SharePoint add-ins.
The list of rooms to map is automatically fetched from Exchange in Office 365. The rooms must be defined in Exchange as a resource of type “Room” to show up in MeetingRoomMap.
Rooms can optionally be organized in room lists - see https://docs.microsoft.com/en-us/exchange/recipients/room-mailboxes?view=exchserver-2019#create-a-room-list
Mapping a meeting room to a floorplan can be done in two ways in the admin web site:
Mappings can be done per floorplan by going to the Images page and clicking “Attach rooms” button for a selected floorplan:
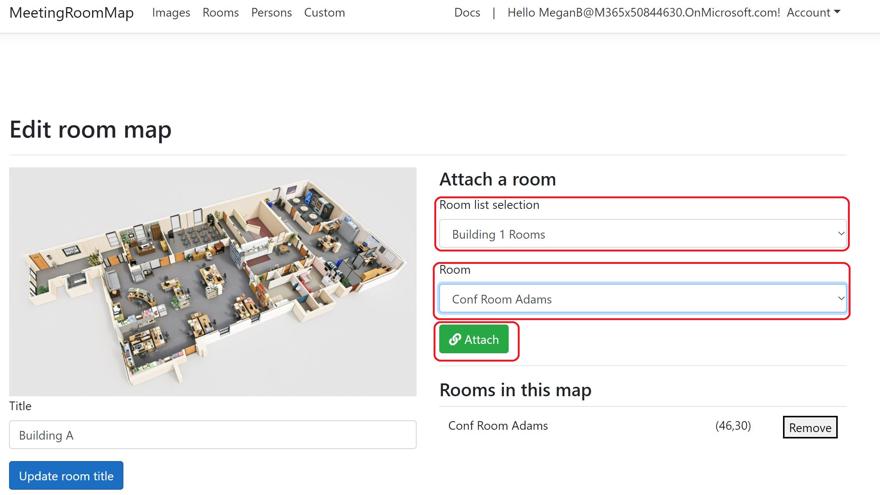
An existing mapping can be removed by clicking the “Remove” button in the “Rooms in this map” list (NB. Requires the role “MeetingRoomEditor” to be able to remove).
Alternatively, mappings can be done by viewing the complete list of known rooms on the Rooms page.
An existing mapping can be removed by clicking the “Remove” button for a specific room in the list. (NB. The button only displays for users with the role “MeetingRoomEditor”).
Mapped co-workers enables searching and viewing their location in the Teams and SharePoint add-ins.
The list of users is automatically fetched from Azure AD and displayed on the Persons page.
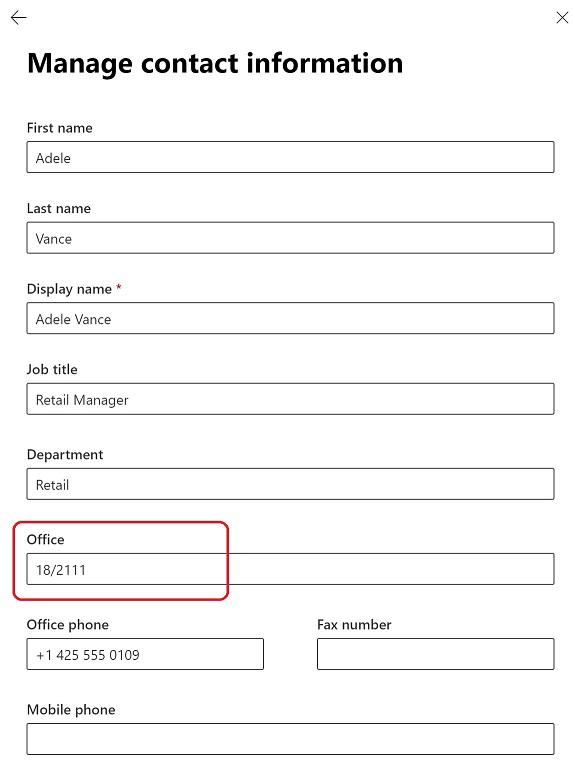
By default users are grouped by their Office location attribute. This enables mapping all users having the same Office Location with a single mapping (see Changing mapping attribute to change the grouping).
The Office location attribute can be viewed here: Microsoft 365 admin center -> Users -> select user -> Manage contact information:
Mapping a user (or group of users with same grouping attribute) is done by navigating to the Persons page.
An existing mapping can be removed by clicking the “Remove” button for a specific user (or group of users with same grouping attribute) in the list. (NB. requires the role “MeetingRoomEditor” to remove).
If mapping users by their office location attribute is not desired, the grouping attribute can be changed. I.e. to ensure all users are mapped individually use ‘email’ attribute.
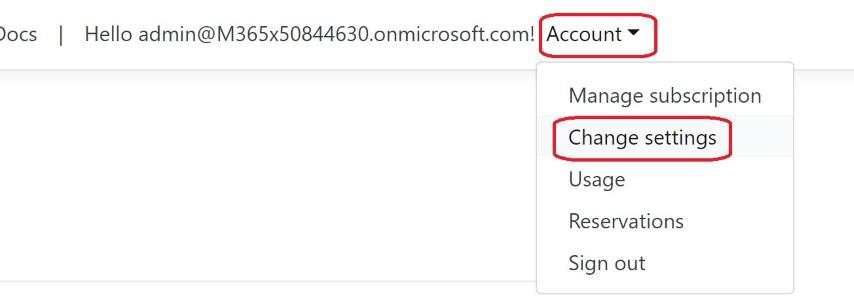
To change the grouping attribute, navigate to the TenantSettings page:
Change the property to group by and click “Save settings”. Be aware that the property specified must be a valid user property name (the internal name as defined in Microsoft Graph API).
Use custom locations to map anything other than meeting rooms and people.
To create a new custom location, navigate to the Custom page.
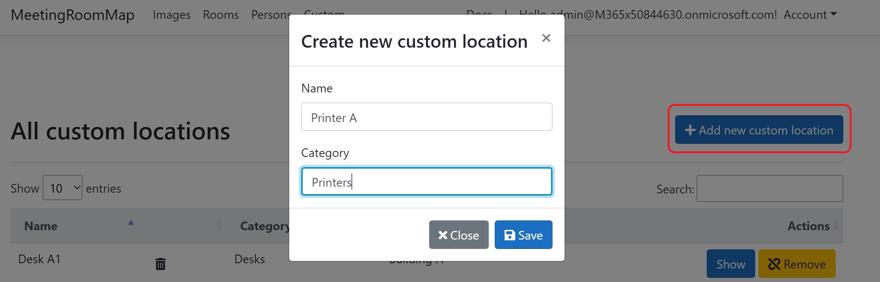
Once a new custom location has been created, it can be mapped to a floorplan:
An existing mapping can be removed by clicking the “Remove” button for a specific location in the list. (NB. requires the role “MeetingRoomEditor” to view the “Remove” button and be allowed to remove).
A custom location can be completely removed including the mapping information by clicking the thrashcan icon for a specific location.
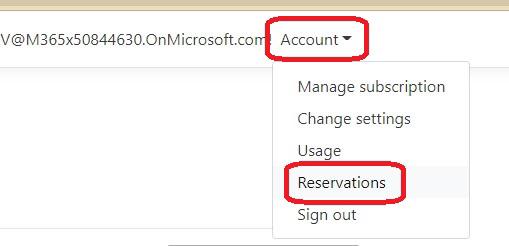
Reservations are normally edited and viewed using the Reservations add-in in Teams. It’s only possible to view your own reservations or those made by other team members - not the entire organization. But an administrator has the ability to view all the reservations across the organization and the possibility to delete reservations made by others.
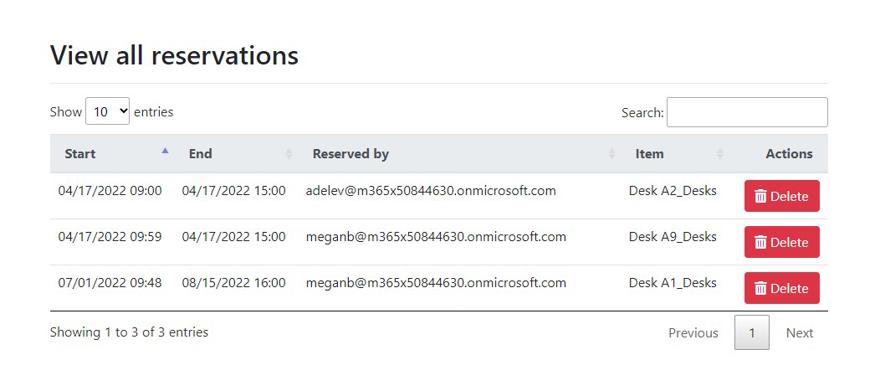
To view reservations as a ReservationsAdmin go to Admin web site -> Account -> Reservations:
From the admin reservation page you can view the list of all reservations. Click the “Delete” button to remove a reservation.
View usage of MeetingRoomMap API actions - these actions can be invoked by both the admin web site as well as usage of add-ins.
The Basic and Standard plans are using actions to count ‘searches’ for billing, when searches exceeds the search limits included in the plan - see https://www.meetingroommap.net/pricing.
To view usage go to Admin web site -> Account -> Usage
It’s possible to select three different time scales for viewing usage history:
Log data are only kept for one month, so it will not be possibly to create views of usage going further back in time.
Log information is recorded with a major category and detailed action within that category, i.e. “CustomLocation.FindByName” (major category ‘Custom locations’ and detailed action ‘find a custom location by name’).
Below is a description of the different actions recorded.
| Log entry | Description | Count as search |
|---|---|---|
| CustomLocation.AttachToImage | Map a custom location to a specific image/floorplan | No |
| CustomLocation.CreateImage | Create image with pushpin indication of custom location on floorplan | Yes |
| CustomLocation.Details | Get all details including image with location for a specific custom location | Yes |
| CustomLocation.FindByName | Find a specific custom location by name | Yes |
| CustomLocation.GetList | Get a list of all custom locations | Yes |
| CustomLocation.GetListByCategories | Get a list of all custom locations within a specific category | Yes |
| CustomLocation.GetListByImage | Get a list of all custom locations mapped to a specific image/floorplan | Yes |
| CustomLocation.RemoveFromImage | Remove a custom location from image/floorplan | No |
| Log entry | Description | Count as search |
|---|---|---|
| Image.Delete | Delete an image (including all items mapped to it) | No |
| Image.Upload | Upload a new image/floorpan | No |
| Log entry | Description | Count as search |
|---|---|---|
| MeetingRoom.AttachToImage | Attach a meeting room to a specific image/floorplan | No |
| MeetingRoom.CreateImage | Create image with push pin indication of meeting room location | Yes |
| MeetingRoom.CreateImageAnon | Create anonymous meeting room image link for embedding in meeting request | Yes |
| MeetingRoom.FindByImage | Get a list of all meeting rooms mapped to a specific image/floorplan | Yes |
| MeetingRoom.NextMeetings | Get list of users next meetings including images with locations (used by Teams Bot ) | Yes |
| MeetingRoom.RemoveFromImage | Remove a meeting room from an image/floorplan | No |
| MeetingRoom.RoomByName | Get details and image with location for a specific meeting room | Yes |
| MeetingRoom.RoomDetails | Get all details including image with location for a specific meeting room | Yes |
| MeetingRoom.RoomList | Get a list of all meeting rooms from Azure AD | Yes |
| Log entry | Description | Count as search |
|---|---|---|
| Reservations.CancelReservation | Cancel a reservation | No |
| Reservations.CreateReservation | Create a new reservation | Yes |
| Reservations.GetActiveReservations | Get a list of active reservations for a specific time inverval | Yes |
| Reservations.GetAllReservations | Get a list of all reservations | Yes |
| Reservations.GetReservations | Get all reservations for a specific item (desk) | Yes |
| Reservations.GetReservationsByTeam | Get list of reservations for all users within a specific team | Yes |
| Reservations.GetReservationsByUser | Get list of reservations for a specific user | Yes |
| Log entry | Description | Count as search |
|---|---|---|
| OfficeLocation.AttachToImage | Attach a person/office location to a specific image/floorplan | No |
| OfficeLocation.CreateImage | Create image with push pin indication of person/office location | Yes |
| OfficeLocation.GetDetails | Get all details including image with location for a specific person/office location | Yes |
| OfficeLocation.RemoveFromImage | Removes a person/office location from image/floorplan | No |
| Person.GetImage | Get details and image with location for a specific person | Yes |
| Person.Search | Returns list of people by searching name/email | Yes |
| Log entry | Description | Count as search |
|---|---|---|
| License.ActivateSubscription | When new subscription is activated | No |
| License.DeactivateSubscription | When subscription is deactivated | No |
| License.UpdateSubscription | When subscription is updated (changing plans etc.) | No |
| Tenant.UpdateSettings | Updates to general settings | No |